_edited.png)
a simple guide to sourdough bread
- Aug 3, 2025
- 4 min read
Updated: Aug 9, 2025
Why Sourdough
There’s something really special about pulling a loaf of homemade bread out of your oven. It feels like a return to something sacred. Like you’re part of a rhythm that’s been forgotten in our fast-paced world. I know there are a million sourdough recipes out there. So many rules, opinions, and methods that it’s easy to feel like you’ll mess it up if you don’t follow everything perfectly. But here’s the truth: sourdough is more resilient than you think!
It doesn’t have to be complicated. It doesn’t have to be exact. This is the simple method I’ve been using in my own kitchen, and it's flexible, forgiving, and easy to adjust to what works best for you. Whether you’re brand new to sourdough or just looking for a less intimidating way to bake bread, I hope this guide brings confidence and peace to your process. You’re capable of doing this, and I’ll walk you through each step.
If you are brand new to sourdough, you will want to start with A Simple Guide to Sourdough Starter before jumping in here.
My method is making dough at night to bake in the morning. You can even do the final proof in the fridge for up to a few days, so it's ready to score & bake whenever you have the time!
What You'll Need
Mixing bowl (I prefer glass or stainless steel)
A damp towel, bowl cover, or plastic wrap
Parchment paper or bread sling
Dutch oven or Loaf Pan
Proofing basket (optional but helpful; you could also just use a bowl)
Kitchen scale
Ingredients
375g water
150g active sourdough starter
15g salt
550g flour (bread flour or all purpose both work)
The Night Before: mix and bulk ferment
In a large mixing bowl, combine 375 grams of water and 150 grams of starter. Stir to dissolve.
Add 15 grams of salt and 550 grams of flour. Mix until there is no dry flour left. The dough will be shaggy and a bit sticky.
Cover the bowl with a damp towel and let it rest for 30 minutes.
Perform a round of stretches and folds by grabbing one edge of the dough and pulling it up and over to the other side. Do this all around the bowl 3 to 4 times.
Cover and let rest for 30 minutes.
Repeat the stretch and fold process two more times, each spaced 30 minutes apart. After the final set, cover with a damp towel and let the dough ferment at room temperature for 8 to 12 hours. It should rise noticeably and look airy and soft.


Bake Day: shaping and proofing
Turn the dough out onto a floured surface.
Shape it into a tight round or oval depending on your baking vessel. You have many different options. I'll just focus on my two favorite ways: a boule in a Dutch oven (round loaf shape) and a regular loaf in a loaf pan (oval loaf shape).
To do this, gently stretch the dough out into a square, then fold the edges in like an envelope and roll it into a ball or oval.
Place the dough upside down into a floured proofing basket or a towel-lined bowl.
Let it rise at room temperature for 1 to 2 hours, or place it in the fridge for at least 12 (up to 48 hours) for a cold proof.
Baking: Boule (Dutch oven) Version

Preheat your oven to 450 degrees with a Dutch oven inside. Let it preheat for at least 30 to 45 minutes.
Flip the dough out onto parchment paper. Score the top with a sharp knife or lame.
Place two ice cubes underneath the parchment paper, then carefully transfer it into the hot Dutch oven and cover with the lid.
Bake for 20 minutes with the lid on.
Remove the lid and bake for another 25 minutes until golden and crisp.
Remove from the oven and let cool on a wire rack for at least 1 hour before slicing.
Baking: Pan (Loaf Pan) Version

Preheat your oven to 450 degrees.
Flip the proofed dough onto parchment and place into your loaf pan. Score the top and spritz lightly with water.
Cover the loaf with a large piece of foil, creating a dome over the pan.
Add a cake pan with about half an inch of water or a layer of ice cubes on a lower oven rack to create steam.
Bake the loaf for 20 minutes with the foil tent.
Remove the foil, spritz again with water, and bake for another 25 minutes.
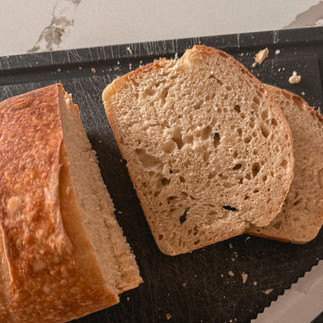
Cool on a wire rack for at least 1 hour before slicing.
Storage tips
Store your cooled loaf in a bread bag or wrapped in a clean kitchen towel for up to 3 days at room temperature.
For longer storage, slice and freeze individual pieces and reheat in a toaster or oven.
There are so many sourdough recipes out there. This one is the most simple method I have found that works beautifully every time. Once you get the hang of the process, it becomes second nature.
It may take some trial and error, but it is worth it. The joy of pulling a golden loaf out of your oven and slicing into a warm, crackly crust is like nothing else. Happy baking!


Comments